How to Make a Traditional and Natural Danish Christmas Decoration
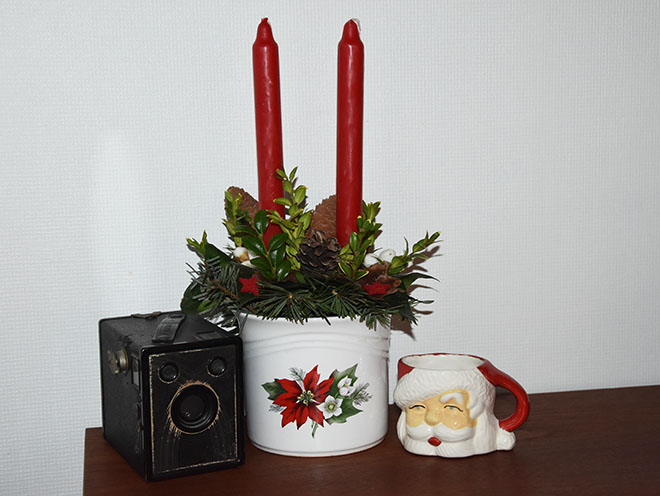
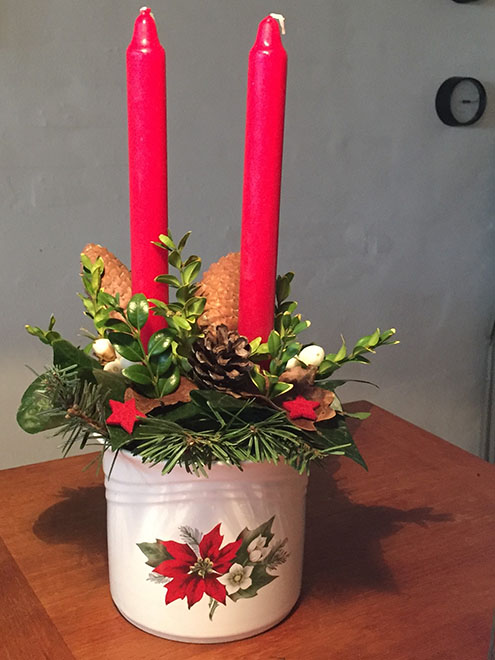
The “Juledekoration” candle centerpiece is a special type of Scandinavian decor that is well-loved by all who celebrate Christmas in Denmark. In fact, not only are these festive decorations widely sold in Denmark in various shops throughout the month of December, but both children and adults also enjoy making their own with natural objects that can be found in their own backyards. Learn all about how to make your own Danish Christmas Decoration!
Disclosure: This post contains affiliate links, which means that at no extra cost to the read, I will earn a commission from every sale made with these links. Readers make their own choices to click on links, and I only recommend sites that I would use myself. More details can be found in the Privacy Policy!
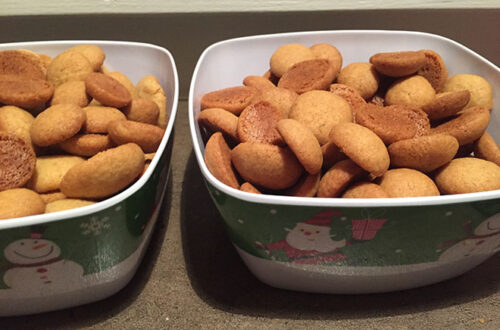
The Danish way of life is centered around finding ways to experience “hygge”, the word they use to describe a cozy feeling, and often, the Danes are spending much of December in various ways filling their days with hygge Christmas traditions like baking pebernødder, cutting down their own Christmas tree or creating Christmas decorations made from nature.
Learn how to make the Danish Christmas cookie called Pebernødder HERE!
Luckily for everyone, you don’t need to travel around the world to experience some of these Christmas traditions. If you are looking to put the “hygge” in your Christmas decorating this year, why not roll up your sleeves and make your very own natural, Scandinavian Christmas decoration! I’ll show you how!
Table of Contents
Buying the Materials for a DIY Danish Christmas Decoration
First, you will need to buy a few supplies for your DIY Danish Christmas Decoration. You can use a flowerpot that you already own to save you some money, but I just went to the second-hand store to buy one with a Christmas flower to make the display more festive.
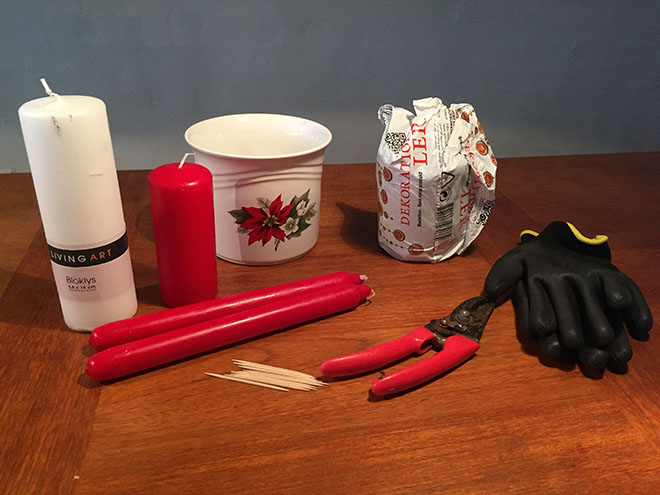
I have also heard of people using small lava stones. Whatever it is you decide to use to fill up half of the pot, I wouldn’t go out and buy a big bag of anything. That is why I decided to use a broken pot. I used the whole thing and didn’t have any extra, so it worked out perfectly.
Next, you will want to buy a candle that will fit easily inside your pot. If the candle is the same size as your pot or bigger, you won’t have much room for the plants, so make sure the candle is smaller than your pot.
You will also want to buy some crafter’s clay. In Denmark, this is called “dekorations ler”. This can be found in any grocery store in Denmark in the month of December. Other countries might have this in craft stores more likely. My flowerpot was only about 5 inches tall, so I only used about half of one bar of clay.
Supplies You Can Get for Free…If You’re Lucky!
Also, you will need to get some filler for your pot. If you fill about half of the flowerpot, you won’t have to use so much clay. I asked the lady at the second-hand store if she had a broken pot in the back of the store that would be thrown away. Being prepared to buy it from here, I was surprised when she said that she could find one they couldn’t sell. She offered it to me for free!
Learn all about how Children Celebrate Christmas in Denmark in THIS VIDEO!
In order to cut your greenery to the size and shape you want, I would recommend having a good pair of gardening shears with you when in your yard as well as at the crafter’s table. In order to hold objects in place and attach them to the clay, I used toothpicks since thin metal pins weren’t easy to find in small amounts in Denmark. The toothpicks turned out to be perfect for this project, and I liked how I was using mostly recycled or natural items.
List of supplies you need:
- Flowerpot
- Flowerpot filler (old pot, lava stones, etc.)
- Candle that matches pot (one larger candle or multiple smaller ones)
- Crafter’s Clay (Dekorations Ler)
- Gardening Shears
- Toothpicks (or thin, metal sticks)
Finding Natural Items for a Scandinavian Christmas Decoration
Once you have all of your store-bought items, it is now time to go out into nature and find some twigs, branches, berries, cones, etc. We are blessed in Denmark to have a wide variety of plants in our backyard. I say that now, because I need a variety for my Christmas décor, but if you ask me in summer when I’m gardening, the story might be different!
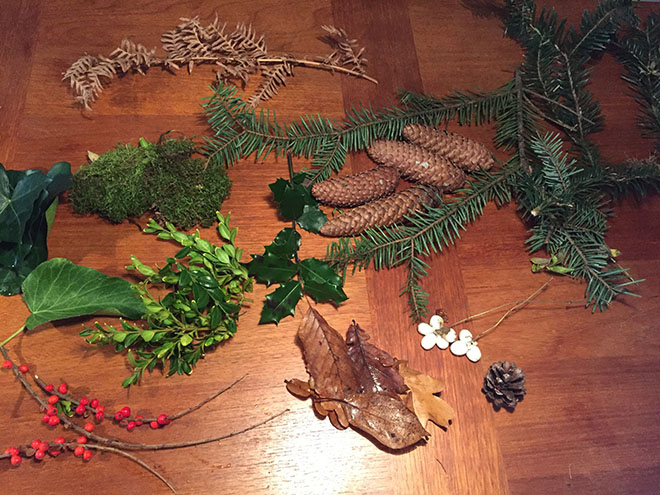
It doesn’t take an entire garden for you to find natural supplies for this Scandinavian décor item, but finding the right pieces is what is most important.
When I went out to collect items, here is a list of what I found:
- Pinecones
- Pine or spruce branches
- Moss
- Boxwood bush stems
- Leaves from climbing vines or trees
- Ferns (Dead or alive)
- Hard Berry branches / Evergreen Bushes
I didn’t use all of these items, but it is often better to have more of a variety to see where the mood takes you in your creative time.
Extra Materials for an Old-Fashioned Christmas Decoration
Perhaps, your centerpiece will be used as a Christmas party decoration, so you may want to have more items that can be found on trees or in indoor decorating. You might want to consider other objects for your decorating that cannot be found in nature, such a ribbon, small Christmas tree ornaments, wooden stars, etc.
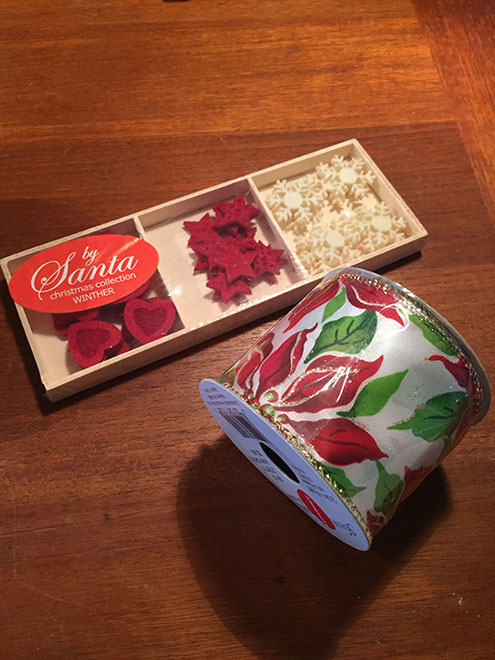
If you live in the USA, many of these objects can be found in a store like Walmart, a craft store or even at a dollar store. In Denmark, you might find such things at a craft store, grocery store, or even a place like Bilka. For me, I found some cute felt shapes at the second-hand store that were still in the original packaging. I am excited to find a way to use some of them in my decorations, because I think it could help make my Christmas eve dinner table a bit more festive this year!
Using Nature Décor to Create a Dining Table Centerpiece
Now, you are ready to begin creating your Danish “juledekoration”! With all of your supplies in front of you, let’s begin following the steps to creating your very own, DIY Christmas decoration! 😊
Step One
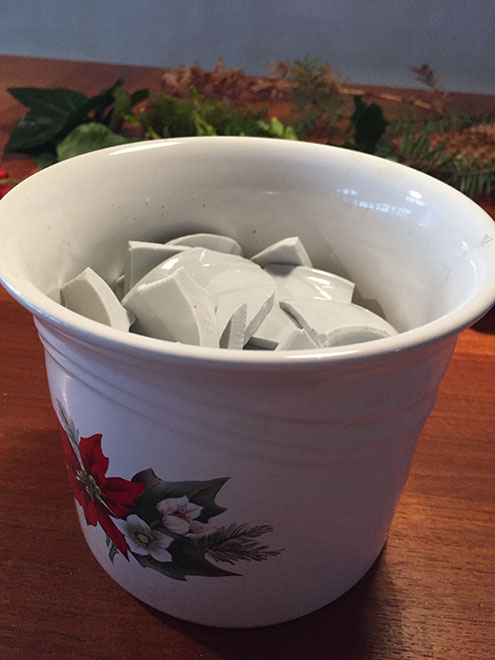
Put the flowerpot that you will use for your centerpiece off to the side. Take a different flowerpot that is old or broken and smash it with a hammer to create small scraps that can be placed inside the flowerpot you will use for your decoration. These scraps should be larger pieces and not super small. Using the scraps of broken pot to fill your flowerpot up halfway. You can also use lave rocks.
Step Two
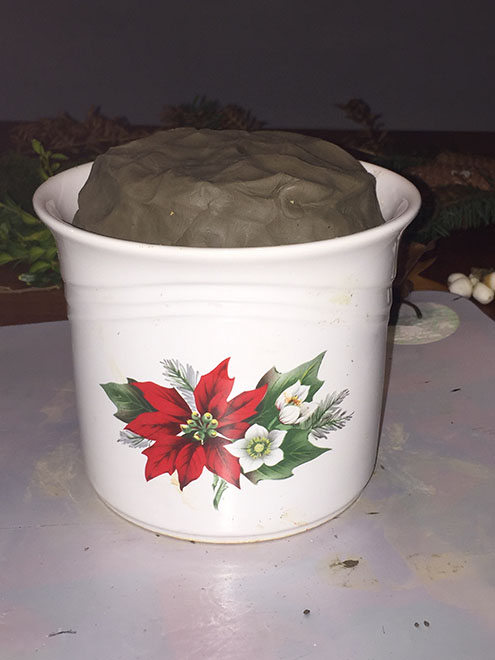
Open the clay and cut off a piece that is about the size of the space left over in the pot. You can do this with a wire or a knife. Mold it with your hands to be wide enough to fit the edges of the pot and place on top of the filler inside the pot. Cut off more clay to add to what is in the pot to create a mound.
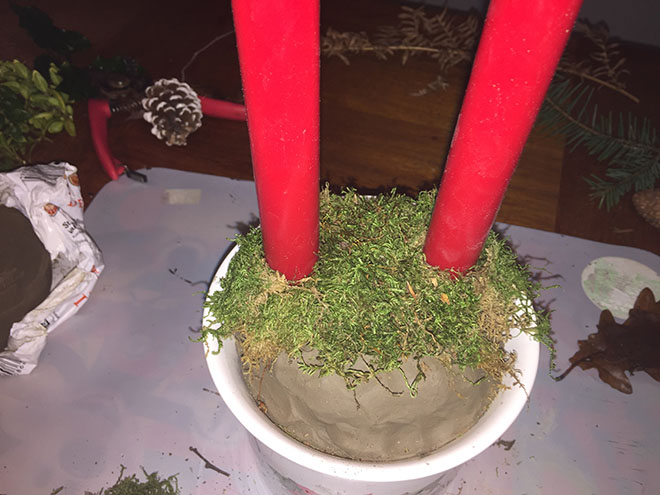
Create a round shape at the top of the mound, but still keep the clay close to the sides of the pot. Once the height of the clay is just above the height of the pot, flatten out the clay to have a place for the candle(s) to sit. Then, place the candle(s) on the top/center of the clay and press down to secure the candle(s) in place.
Step Three
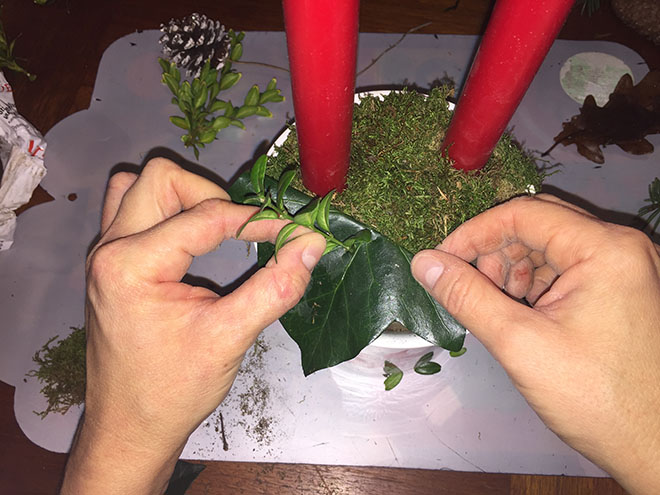
Find some natural objects that would be large enough to cover the clay. This would be a good time to use the moss and the larger leaves. Place the moss on two or three different places of the clay and then fill the gaps with larger leaves. In order to get the leaves to point upward, bend the leaf with the bent part touching the candle. I will often put a smaller, brown leaf on top of the bigger, green leaf to add some contrast.
Step Four
When you have the moss and the leaves on the sides of the candle(s) covering the clay, you are ready to find some smaller branches or twigs to place on top. These may be smaller branches from bushes. You can use your gardening shears to cut them to a size that fits your display, and make sure that you trim the leaves from the bottom of the branch in order to have enough of a stem to pierce the leaves and clay underneath.
Step Five
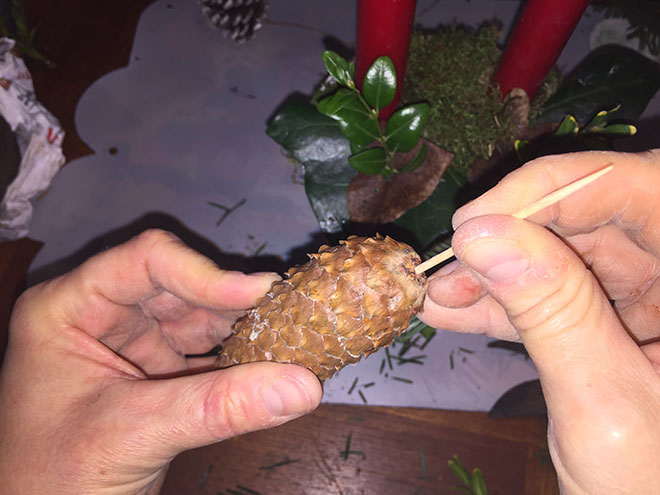
Pinecone Christmas decorations also help to bring the beauty of nature to your dining table, so they are great to add to any Nordic Christmas decoration. It might be best to use a cone that is a proper size for your flowerpot. Insert a toothpick to the bottom of your cone and press the rest of the toothpick onto the top of the leaf or moss area where you want your pinecone to go.
In Denmark, there are many traditions that help the Danes Count Down to Christmas! Read all about them HERE!
Step Six
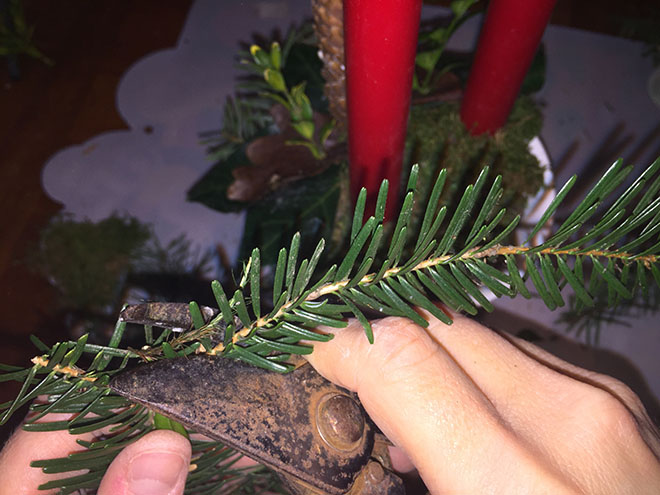
Another addition to your candle holder centerpiece is the use of either pine or spruce branches. Use your gardening shears to cut off some of the needles on the bottom of the branch in order for it to pierce the leaves and clay easier. I decided to lift up the larger leaves and place the pine branches just underneath. There are so many ways to style this type of craft, so you can truly make this a very unique Christmas decoration that reflects your own personal tastes.
Step Seven
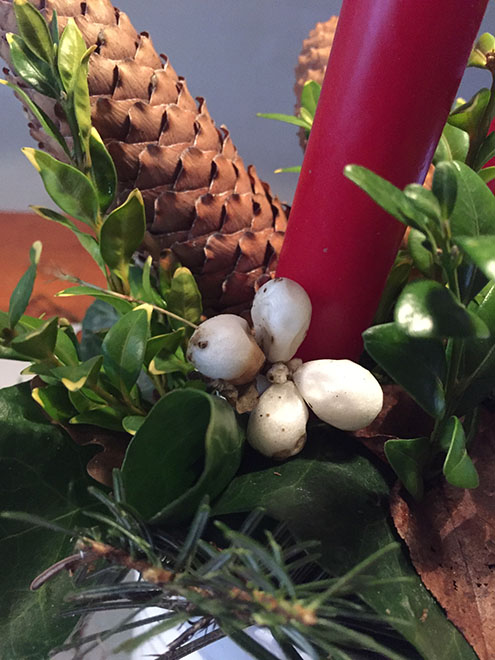
Since the centerpiece is starting to look almost complete, I use this time to add a few extra pieces. I have these bushes in my yard that have these white, cotton-looking things on them. I thought the white would offer a nice contrast, so I place them on the side. This would also be a good time to put any berry twigs on the decoration as well.
Step Eight
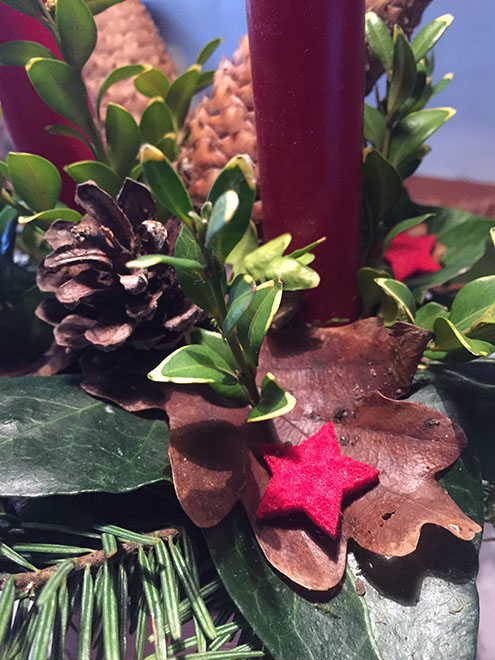
The last step for my “juledekoration” is adding the little red, felt stars that I got at the second-hand store. I was so surprised to find these. They turned out to be the perfect accent of red that I needed to pull the whole project together in the end!
Why I Love DIY Décor in Denmark
The great thing about making a traditional Danish Christmas decoration is that there are no design manuals. Each “juledekoration” can be different from one to the next. You can make them as big and extravagant as you want. They can be simple displays of the comfortable “hygge” design that the Danes and other Scandinavians are famous for.
This is such an easy craft project that you can be done at a rather low cost. This is because of the items can be bought secondhand or found in your own yard.
You can also watch this tutorial with another Juledekoration in THIS VIDEO!
No matter where you live, I hope you have a wonderful Christmas! Enjoy making your own, natural, Danish Christmas decoration this year!
Pin it, Save it and Share it!
Subscribe and Join the Fun!


