
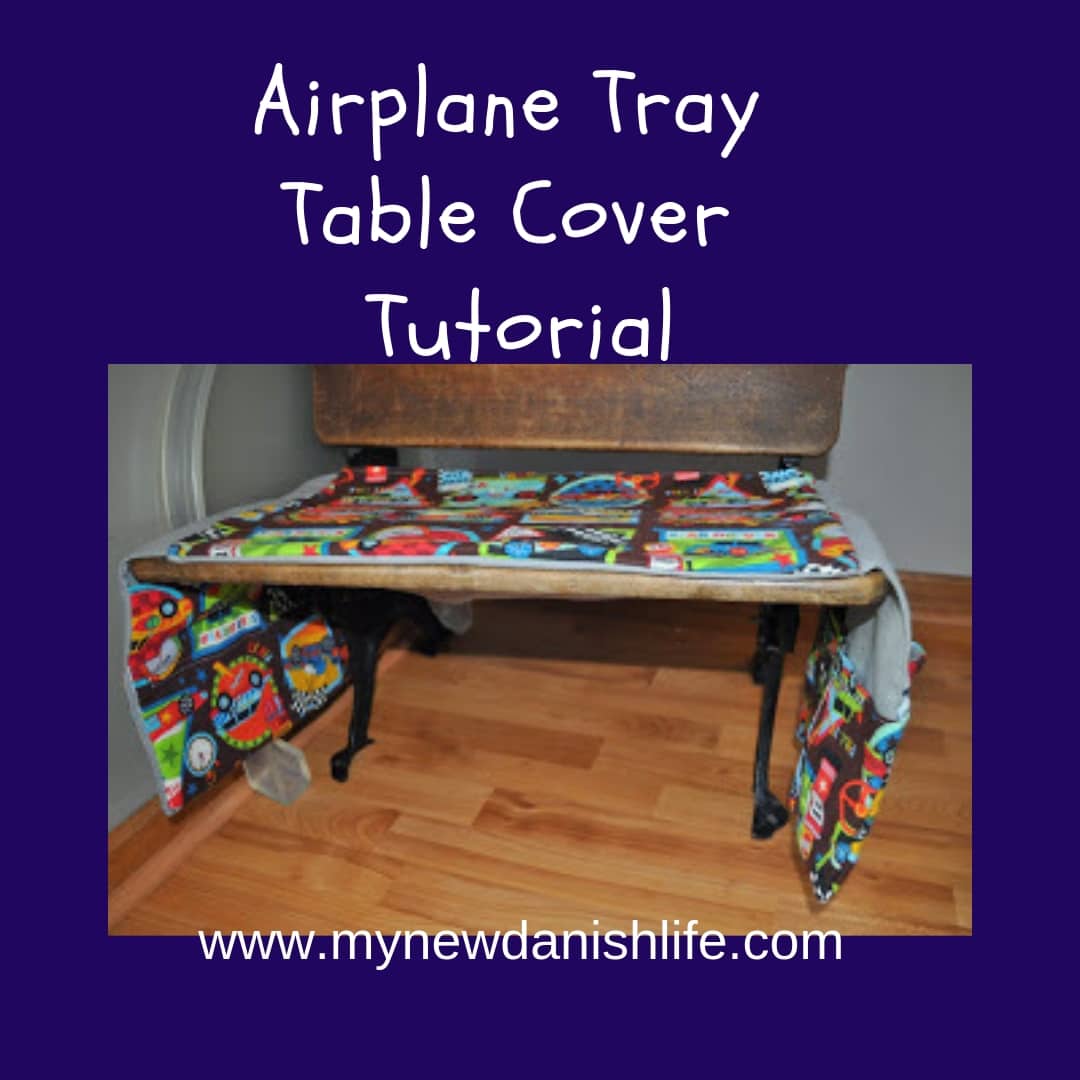
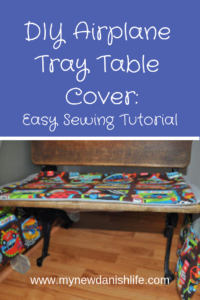
Airplane Tray Table Cover (Beginner Sewing)
Because summer vacation is on my mind, I wanted to see what I could make to help with the long rides coming up in the airplane as well as in the car. We took a trip recently to visit family 5 1/2 hours away, and I tried to see what it was that would keep both boys organized/occupied. We took a lap desk along with us (see quiet book pictures), but after trying to put it in the suitcase (as a trial run for packing), I discovered that it wouldn’t fit for the upcoming trip this summer. When we flew before with big brother at the age of 2, he didn’t have much to do after a while. We would take some little cars and/or trains to keep him busy, and also a small coloring book with some mechanical crayons. Those were helpful, but the train took up lots of room in the bag because we packed it with some tracks in an empty baby wipe container. That wasn’t 

(This post may contain affiliated links, which means that if you click on a link and buy something, I will earn a commission. This is at no extra cost to you!)

I started to look online in Pinterest and Google to find a cover/organizer for an airplane tray cover. I saw a really neat organizer that I could buy, but every time I find it online, it appeared to be no longer for sale. 🙁 Plenty of people talked about how they liked it, but all links ended in disappointment. I then came across a tutorial for an airplane tray table cover at Serving Pink Lemonade. I really liked her idea, and it was great to have the measurements for the table. I didn’t want to make the exact same one because I wasn’t making it for a baby. She gave me the idea and a place to start, so I really wanted to mention her here. I kept looking and found another site that had a better idea of what I wanted. The Mer Meg blog had a cute lap desk that looked close to what I wanted, but I was really unsure if I could make it since the tutorial was a bit raw and I had only been sewing for about two months. I looked at it for a while and thought, what the hey! 🙂 I gave it a go and this is what I did. (See the bottom for links to other sites where I got ideas.)

Table of Contents
Materials
Fabric 19″ x 25″ (main)
Fabric 20″ x 13″ (pocket)
Fabric 20″ x 13″ (pocket)
20″ long Velcro strip (cut it in half)
4 snaps
thread
sewing machine and needle
(optional: piece of 17 1/2″ x 11″ think cardboard, foam board, plastic, etc.)
(optional: small, child’s pillow)
Step One
Cut on the fold of the fabric a 19″ x 12 1/2″ piece of fabric. I had the folded part be 19″. Since the airplane tray table is said to be about 17 1/2″ x 11″, I wanted to have some extra room, just in case. I also planned on having hanging pockets, so the extra room should be okay for hanging.
Step Two
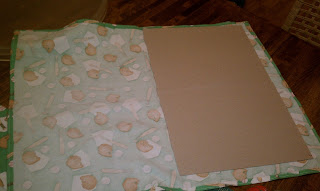
Turn down all edges about 1/4″. Press and sew. Fold over the fabric so that it looks the way it did when you cut it out. I used a piece of thin cardboard that was measured 17 1/2″ by 11″ to fit inside, just to be sure it would fit the table. (Thin cardboard was taken from two packs of decorative computer paper I had in my office. You could skip this.) Sew it together on the two sides and the bottom, but be sure to leave the top part open. This will allow you to slip the board in and out to make the “desk” part for the car. I am not sure if the tray table will slide in here as well, since I haven’t used it yet. 


Step Three
In order to make the pockets that go on each side of the tray, you will need to cut 2 sections of fabric that equal 20″ x 13″ each (one-sided). Turn down edges about 1/4″ on the 20″ side, press and sew. [Follow steps 3, 4, 5, and 6 for both sides. You could do step 7 for both sides, but I didn’t…just so you know.]
Step Four
Fold one of the short sides by 2″ and the other short side by 5″. Pin these sides in place. Total should be about 12 1/2″ (roughly) x 20″ at this point when measured. 
Step Five
Sew along the long sides to hold the folded pieces in place. 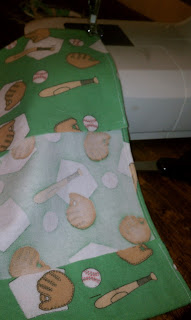

Step Six
Fold the 2″ end over the 5″ end, but leave a bit of space at the top. This creates a pocket. Determine the depth size of the pocket you want and pin in place. I had about 4 3/4″ between the top of the piece and the top of the pocket. 

Step Seven
(See note at the end of step 3.)I wanted to make a cup holder that would be the perfect size for the sippy cup my son uses, so I put one of his cups in the right side pocket to measure. I placed a pin in the fabric to tell me where I should sew and then took the cup out. I then measured the space of the pocket from the outer edge to the pin all the way down the pocket and marked it off with a fabric pencil to insure a straight line when sewing. I sewed along this twice to insure it would hold better.
Step Eight
I then pinned each side to the main piece of fabric so that they would hang down. 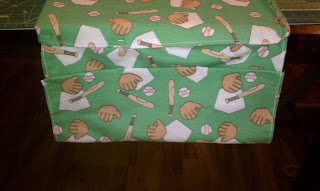
Step Nine
Then I flipped it over and pinned a strip of Velcro in the middle of each piece. I had the idea of using the Velcro to attach the cover to the airplane tray table. I wasn’t sure if the tray would just slip into the hole where I placed the cardboard earlier, so I wanted to have a “plan B” way of attaching it to the table. I didn’t want it slipping off every 5 minutes. Be sure to test the Velcro before sewing to make sure that it lines up correctly. I had to take mine apart and sew it over again because the Velcro wouldn’t stick together. Sewer’s Tip: When you are tired, stop; otherwise, mistakes are inevitable! 🙂
I know it seems like a lot of steps, but it really wasn’t that bad!
Step Ten
Sew the hanging sides onto the big piece. I was sure to go over the same line that was already there so not to have too many sewing lines on the fabric. This line is VERY close to the edge of the main piece of fabric. I also went over the Velcro section multiple times to make sure it wouldn’t come apart.
Step Eleven
Now to make a pillow pocket. This is to use in the car as a lap desk. If you don’t want to make the lap desk, skip this part. I had the cover upside down on the table. I placed the pillow on top and made sure the opening of the desk (see step one) was at the top, since the opening for the pillow pocket would be at the same place. I then put material over the pillow to measure what I would need. I then pinned it, marked it with a fabric pencil, cut it out and (pressed first) sewed down the edges (1/4″). I attached the cover to the main piece of the tray cover on the bottom only by sewing it down along the line that was already there from sewing down the edge.
Step Twelve
I then sewed one snap in the middle of the “cardboard” section to close that off and three snaps (left, center and right) on the pillow pocket part to close the pillow up. 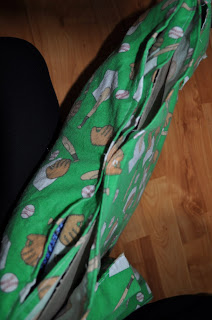

That’s it! I can roll it up and fit it in my son’s drawstring bag, which makes it great for travel. I plan to put a foam board that measures 17 1/2″ x 11″ in our luggage, since he won’t need it until the car. He won’t also need the pillow, but we may bring it for sleeping on the plane. I’m just trying to find things that will fit in his suitcase.
I know that it doesn’t sound very professional, but I’ve only been sewing two months. I am no way near the professional level. I am just still shocked I could do this on my own. If you are better at sewing, make it easier on yourself and alter it. I would if I could! 🙂
Other Sites that had great ideas!!!
Update After Trip
After using the cover, I am pleased with what I did. The only things I would do differently would be:
1) I would add velcro to the large pocket on the left side of the cover. There wasn´t much keeping the goods in the cover when we had to put the tray table up.
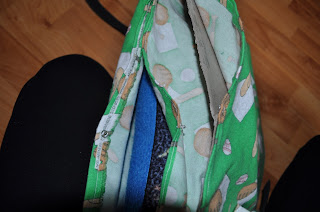
2)I would make the cup holder on the right a tad bit longer. Though the cup fit in there perfectly, the pocket did not hang straight with it in it when in use. That made it easier for the cup to fall out. I also decided to use a Brita bottle for the flight, which was better for my now 4-year-old boy. It also didn´t spill. We could fill it up with water, which would be filtered at any drinking fountain. The filter also came out in case we wanted to use it for juice or milk.
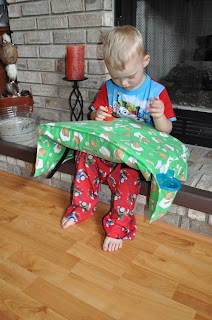
Here are a few pictures of the cover I made for my youngest son:
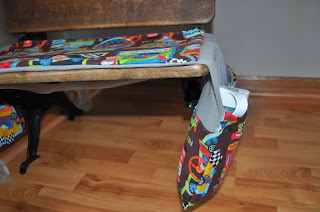.jpg)
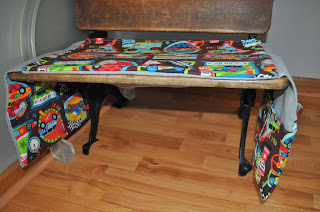.jpg)
The Brita bottle is in the cup holder. This was made with the same dimensions, except that the sides were a bit longer to adjust for the larger cup and adaquate hanging space. You might want to find a surface (like I did with this antique school desk) to measure that the length is good with the cup and that the pocket hangs straight down. Happy travels!
Like this post? Subscribe to my blog and get more ideas of projects sent to your email. Also, don’t forget to follow me on my social media accounts and check out my Youtube Channel to see some of my many sewing tutorials.
Pin it and Save it for Later!


Kelly
Hi! I'm Kelly, an American mom and wife to a Dane. After deciding to move to rural Denmark in 2016, I decided to share the highs and lows of expat life in Denmark with lots of fun family experiences and trips in Denmark to make it all a bit more interesting! :) Welcome to My New Danish Life!


4 Comments
Pingback:
Pingback:
kutercarol
What a great idea! Love the step by step instructions!
Kelly
Thanks! We really find them useful when we travel!