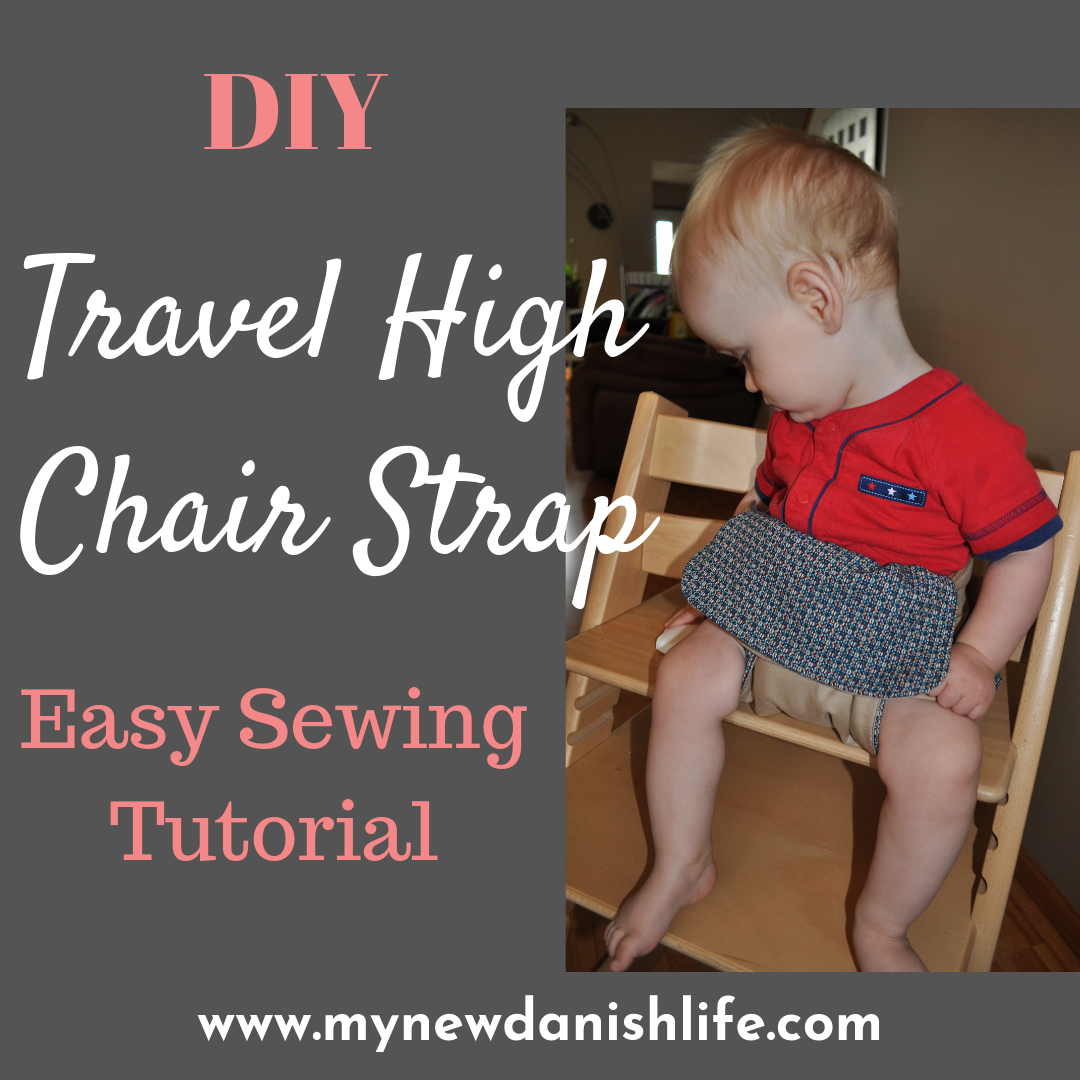
Travel High Chair Strap (Beginner Sewing Tutorial)
If you are looking for a quick and easy sewing tutorial for a travel baby high chair strap, you have found the right place.
Traveling with babies and toddlers can be a hassle when it comes to packing. Though they are so little, they need a lot of items when traveling and the suitcases tend to be filled with mostly their things. I was determined to find a better way of packing, which meant that I would have to MAKE a few things for our next trip. Luckily, I was always ready for a sewing project, and I was ready to make my own baby chair.
This page may have affiliated links. Read the Disclaimer and Disclosure page for more information.
When my son was 9 months old, we traveled abroad one summer to visit family. I knew that some of the places that we would be visiting would be places where babies didn’t visit often, like the homes of elderly relatives or friends without children. The need for the best high chair (preferably travel) was there, but I dreaded the thought of how much space it would take up in not only the suitcase, but the diaper bag.
After a bit of online searching, I came across two really cute ideas for making my own portable travel high chair. Don’t misunderstand the name, because it wasn’t a chair, but instead, it was a strap used for a regular chair. I thought this was an awesome idea, since it would be an easy fix to the “no high chair” issue when traveling and allowed us to save some space in our bags.
The cute examples I found were from This Mama Makes Stuff and Homemade by Jill. (Unfortunately, these sites are no longer active, but I still wanted to give credit to them for giving me the inspiration to make my own version.) I took ideas from both sites when making my own.
Table of Contents
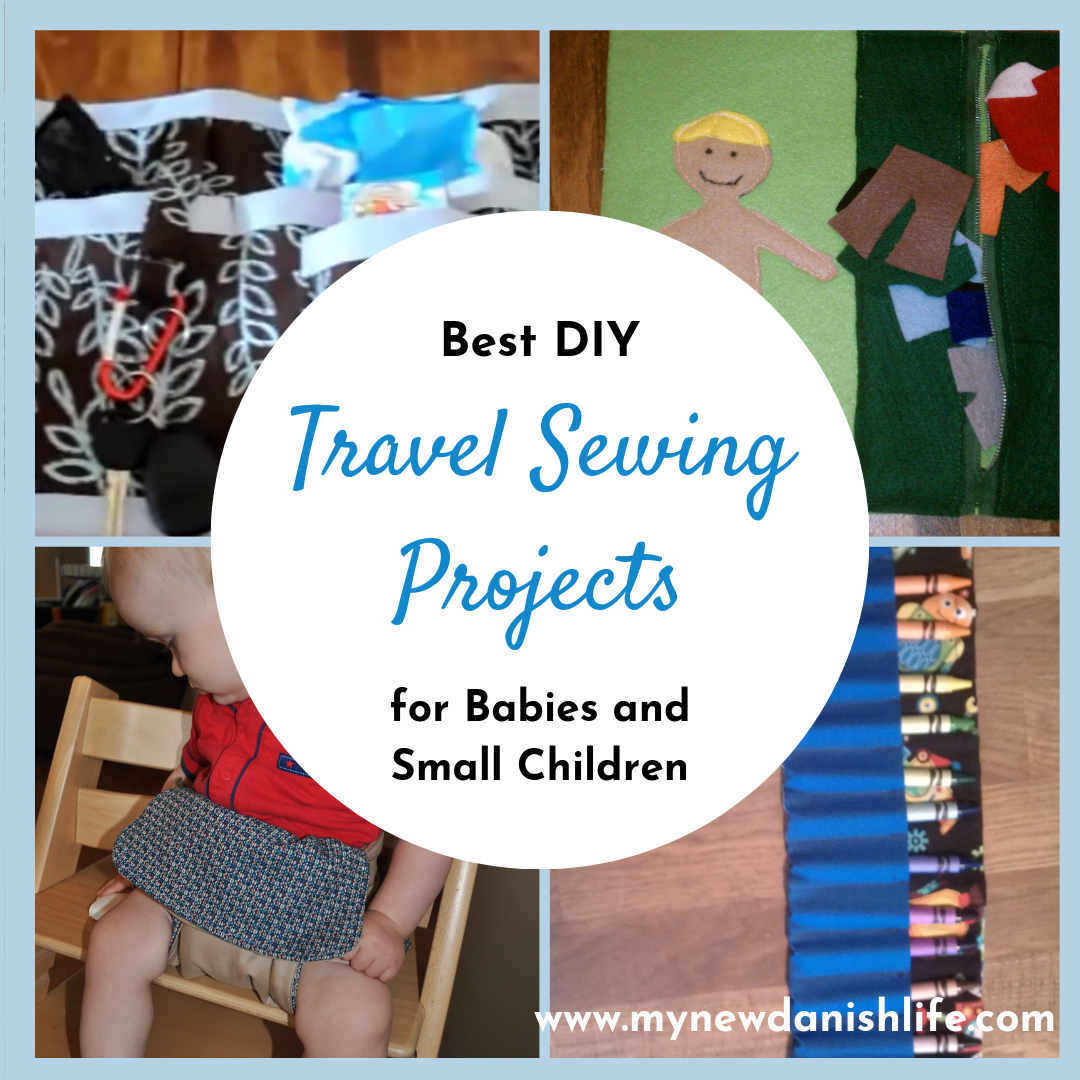
Need more ideas for sewing projects? Check this out: Best DIY travel gear sewing projects for babies and children.
I looked through my fabric stash to see what would work out. I decided to use a pillowcase leftover from the stroller organizer I made. I liked tan/khaki, since it went with everything. I also had this turquoise fabric that just looked pretty and fun. I thought it would be a nice contrast to the tan.
The examples online showed one pattern on the outside and a different one on the inside. I have to admit that I planned on only using one design for the entire project to make it easier, but I decided to use a different design for just one side of the seat piece. I liked the contrast it offered when in use.
Here is how I made mine:
Step One
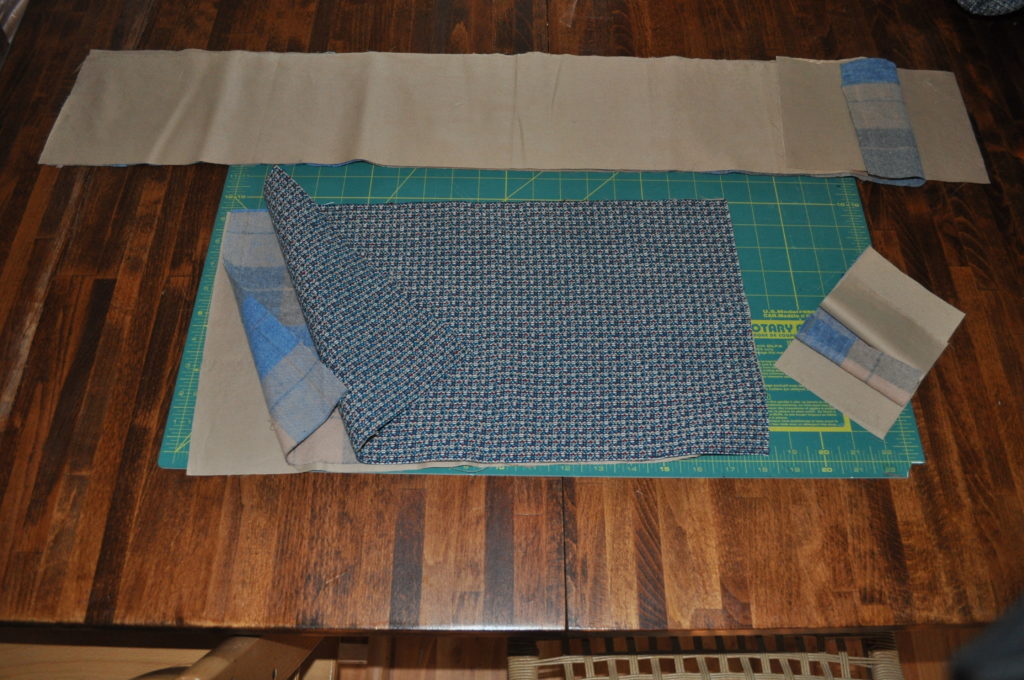
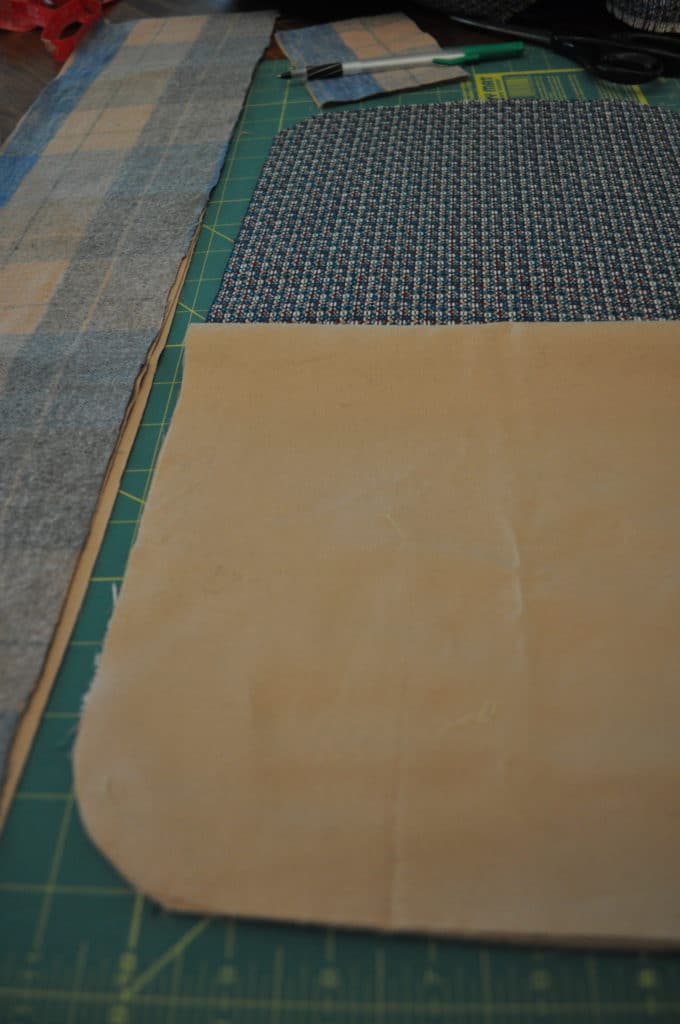
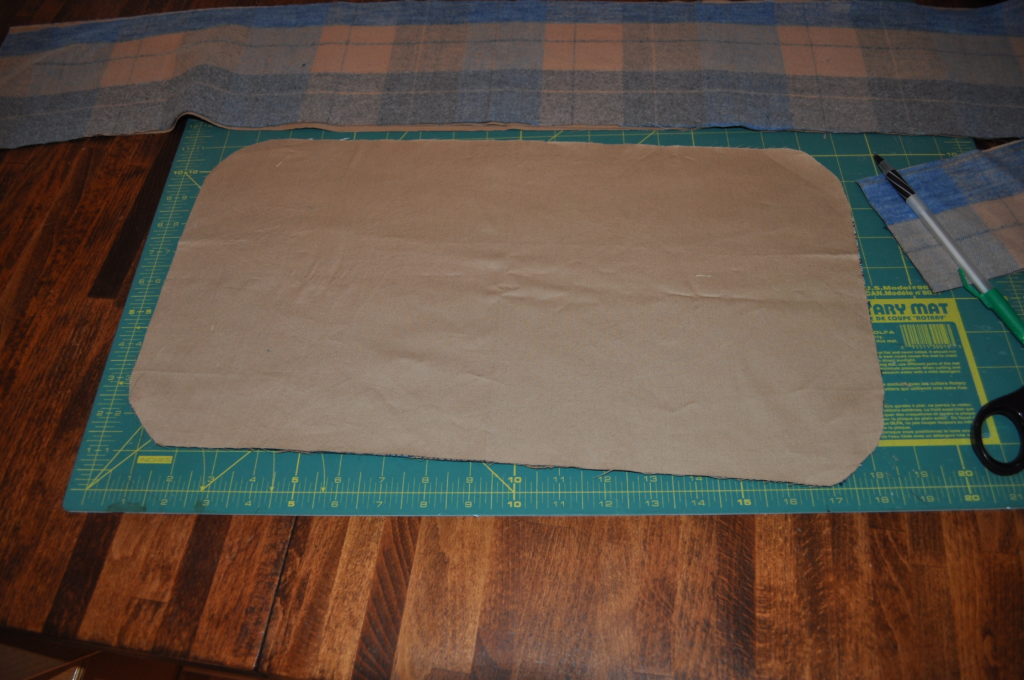
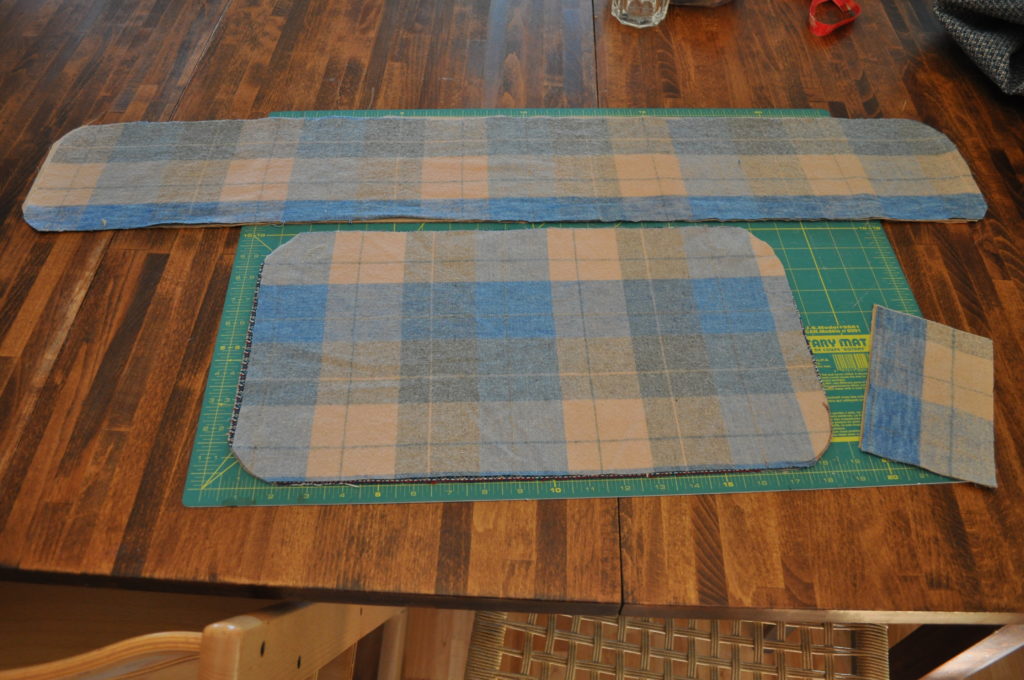
First, I cut out three sizes of material.
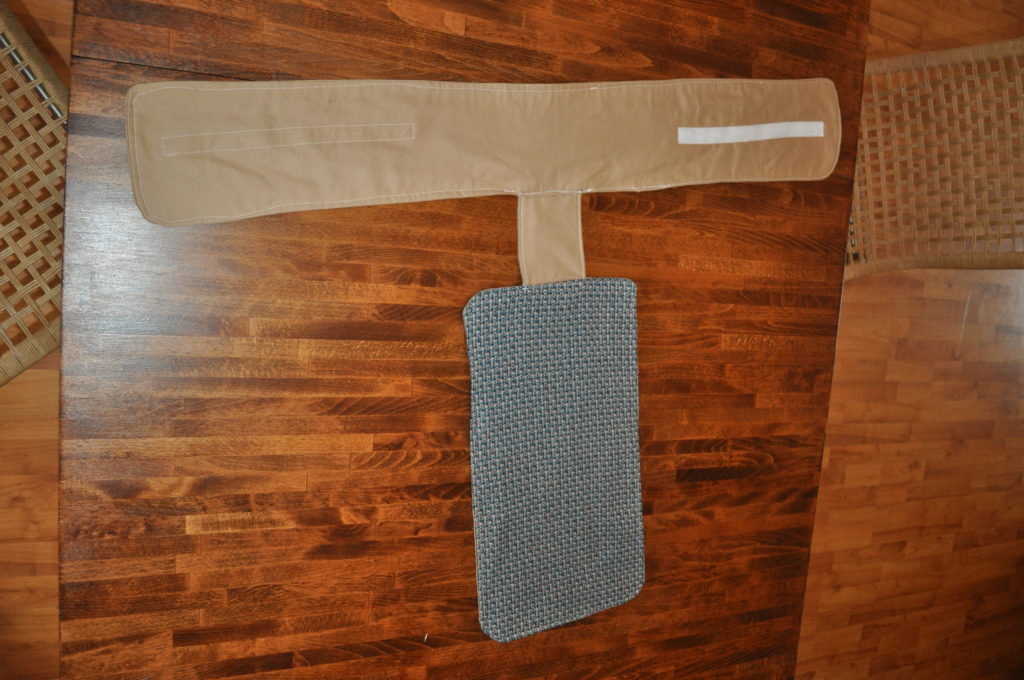
Strap: 6″ x 37″ (need two)
Connector Piece: 6″ x 4″ (need two)
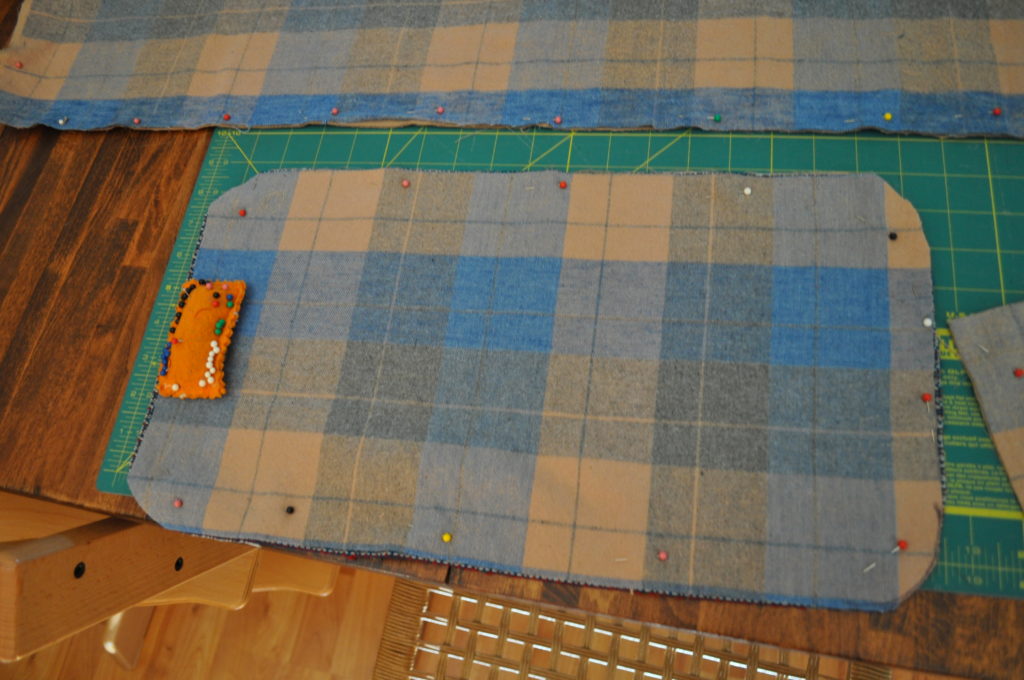
Seat: 10″ x 18″ (need two) (I used two different designs for this one only.)
Step Two
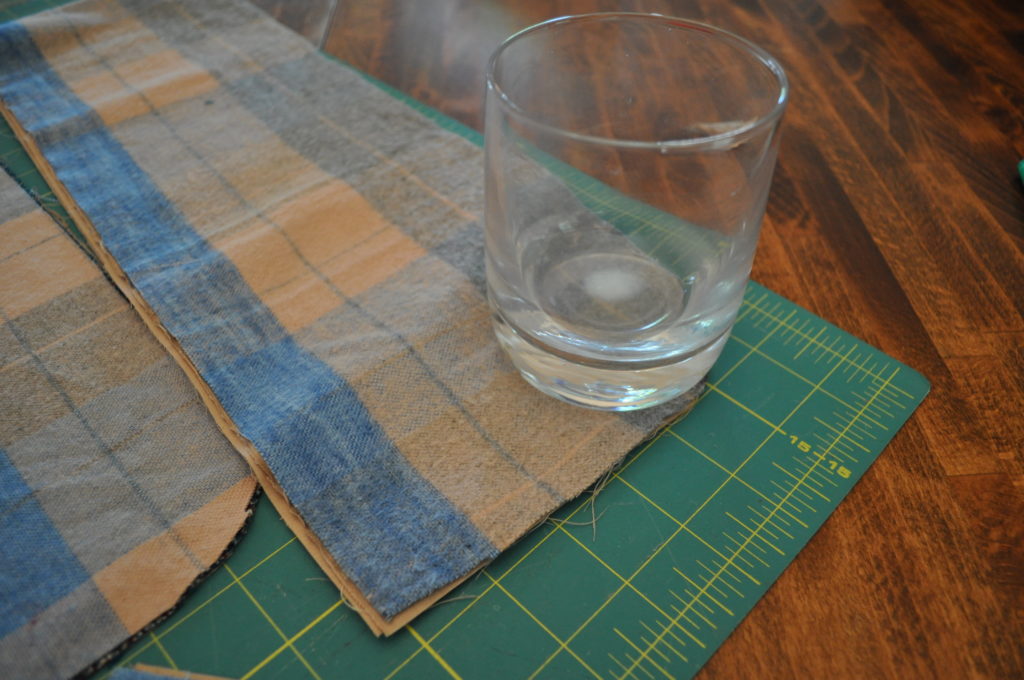
Instead of using batting, I used leftover flannel that I had in my stash. I cut flannel lining for each of the three pieces.
Flannel or Batting Layer: 6″ x 37″, 6″ x 4″, 10″ x 18″
Step Three
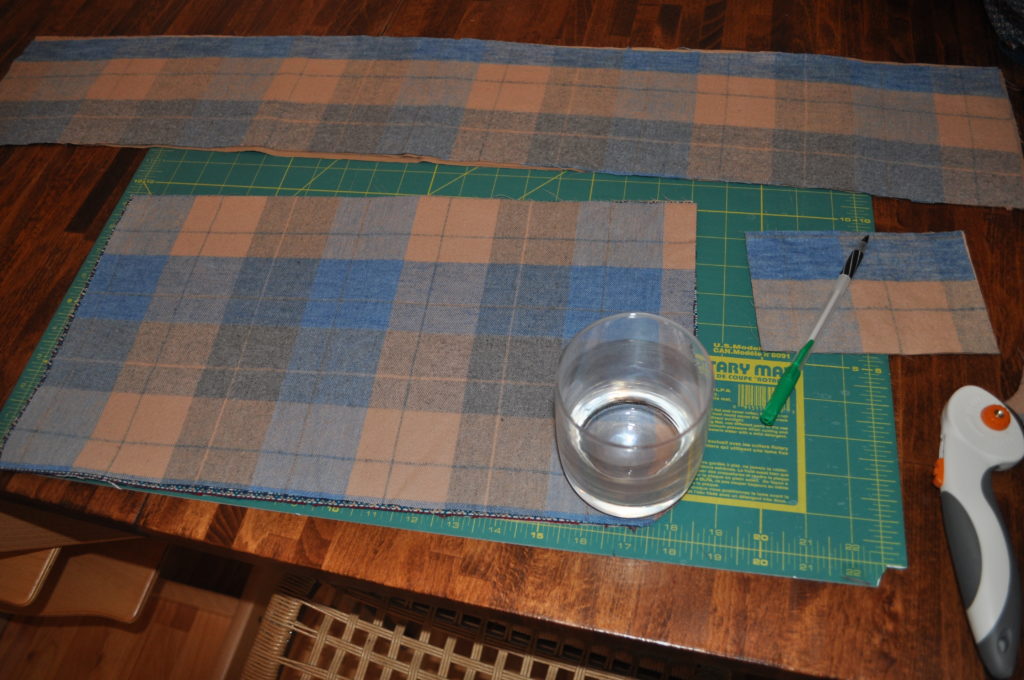
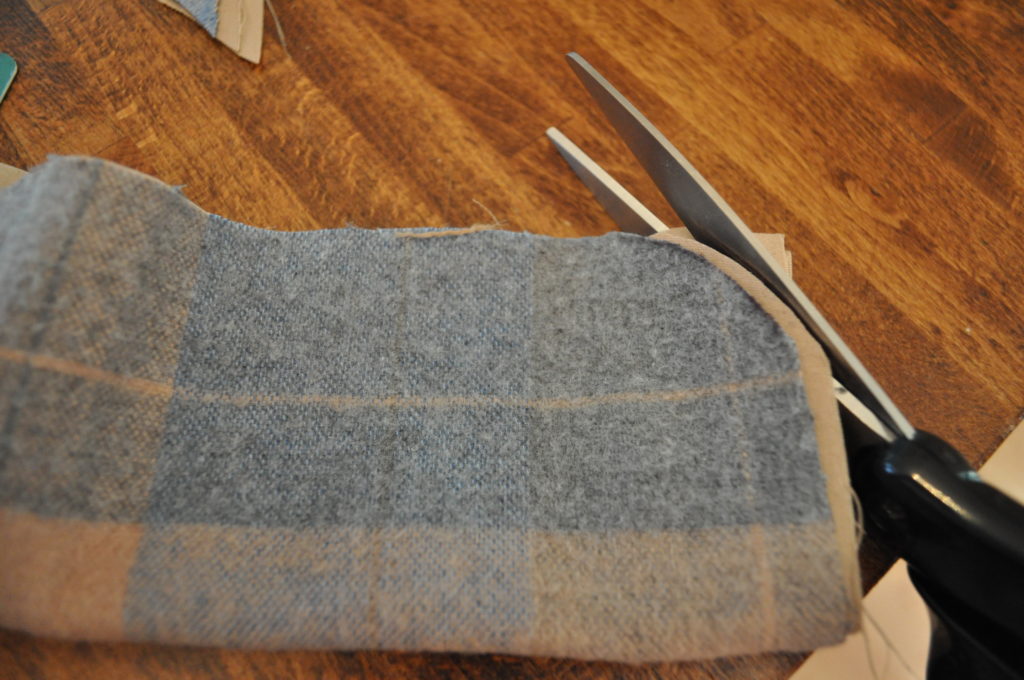
I placed the flannel on top of the fabric for the strap piece and the seat piece and used a water glass to round out the edges. Since I wasn’t sure how to round the edges at first, I googled it. I found pictures of CDs, plates, etc. being used to trace on fabric to make them round.
I used a water glass to trace one corner and then cut it out. Then, I folded the fabric over to cut another corner and continued to fold and cut so all corners were the same.
I also remember from sewing class that I needed to snip the edges so that when the material was turned out, it didn’t have weird corners.
Step Four
Next, I cut the Velcro and pinned the rough part to the “right side” of fabric on the right side of the strap . I made sure to center it and pin it 1″ from the edge (6″ side). I did the same with the soft part of the Velcro on the second piece of the strap. (When putting them together to sew, make sure that the Velcro is not on the same side. This means that when you flip the strap over, the Velcro will be on the right on one side and the left on the other.)
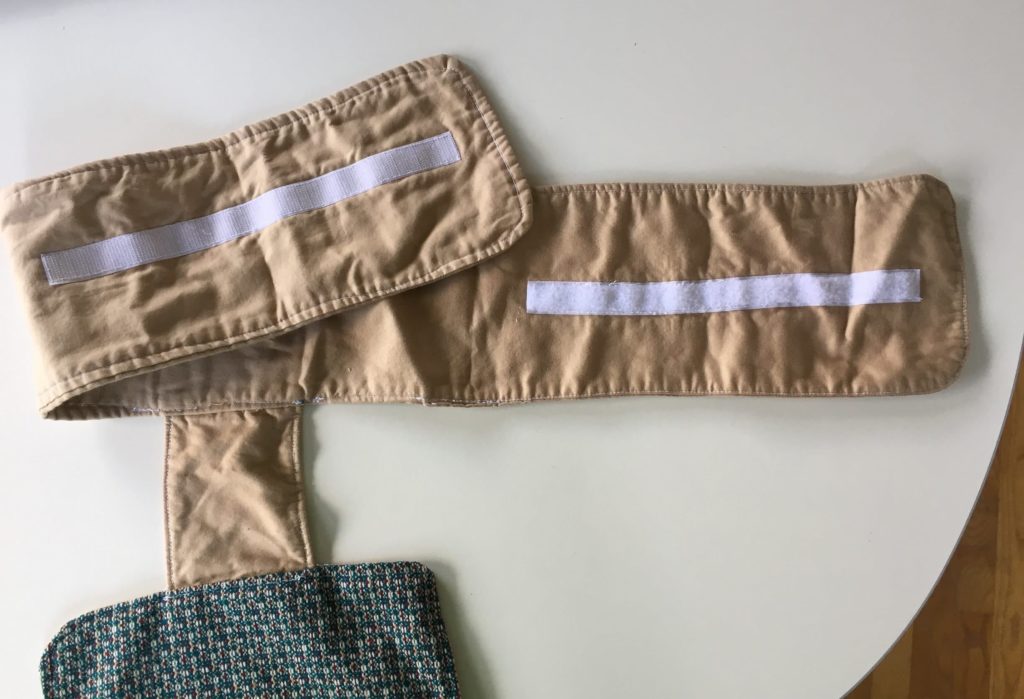
(Sorry for the wrinkled picture, but it was well-used by the time I took this picture.) 😉
Velcro: (1) 9½” strip
Step Five
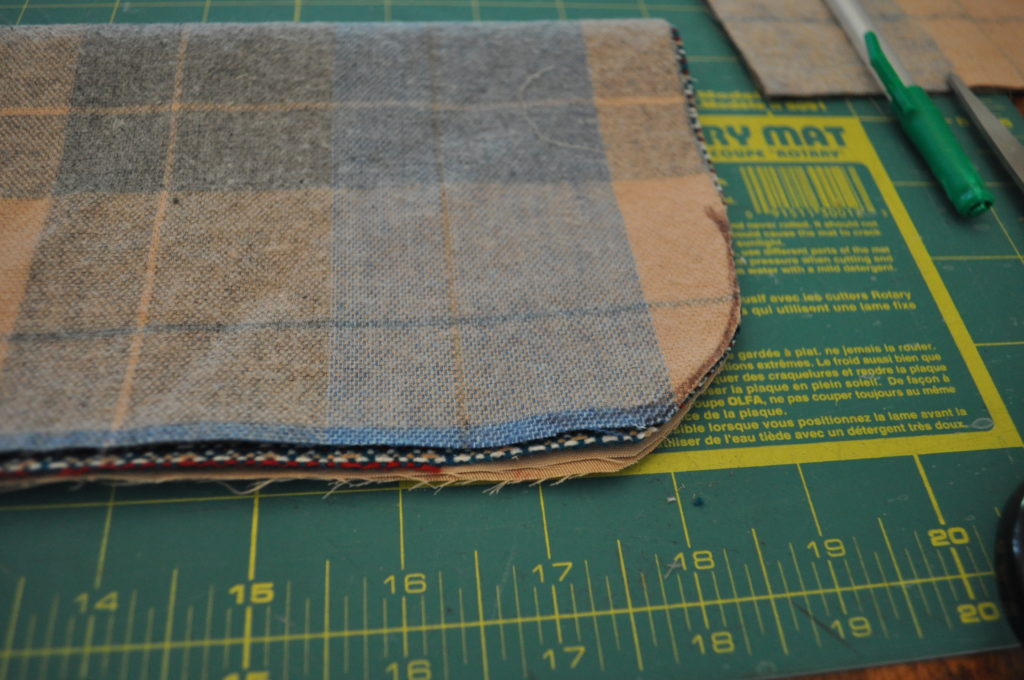
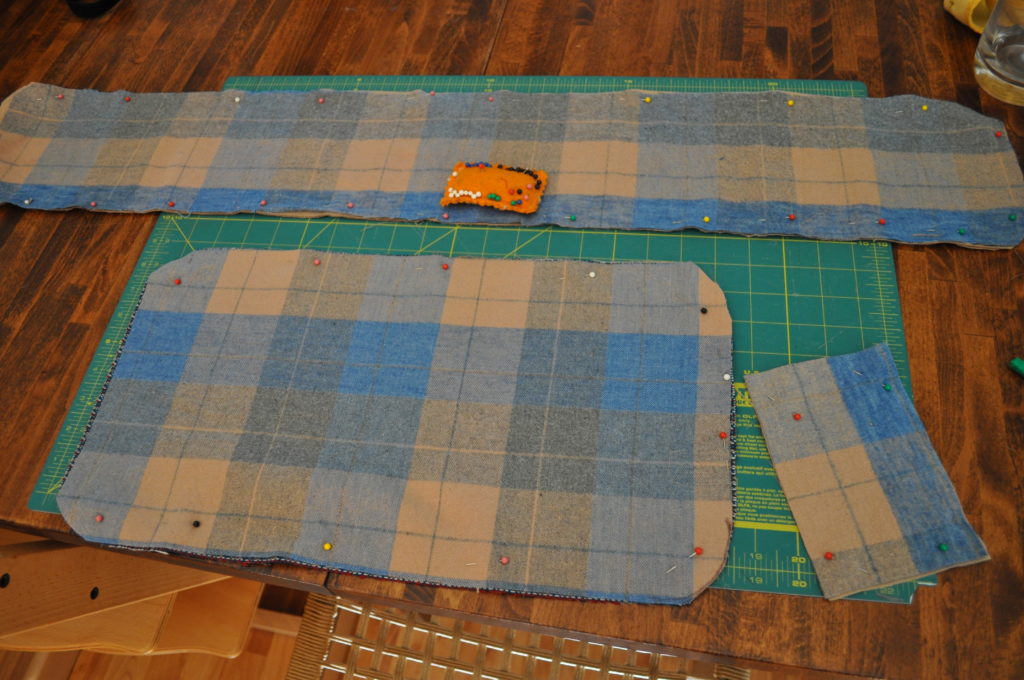
I put the right side of the “like” pieces together with the flannel on the top and pinned all the way around for each of the three different sizes.
With the “seat” piece and the “strap”, I made sure to leave a open space in the middle of the 10″ side of the “seat” piece and the middle of the 37″ side of the strap piece so that I could turn it out when done and so that I could have a spot for the connector piece.
The space that I left open was about 4″ on both pieces. (Be sure to back stitch at the beginning and ending of each piece you sew.) I sewed all the way around except for the areas I mentioned above.
For the connector piece, it was only important to sew along the 6″ sides, since the 4″ side of the fabric was hidden.
After sewing, I turned the fabric “right side” out. I was sure to push out all corners.
(Below, you can see where I put my “open spaces”.)
Step Six
Once the pieces had been turned “right sides” out, I inserted the connector piece in the middle of the strap (37″ side) and the middle of the seat (10″ side) where I left the open space. Then, I pinned it in place and did a top stitch. In order for it to look nicer and to secure the batting/flannel, I made a top stitch all the way around all of the pieces.
All Done! 🙂
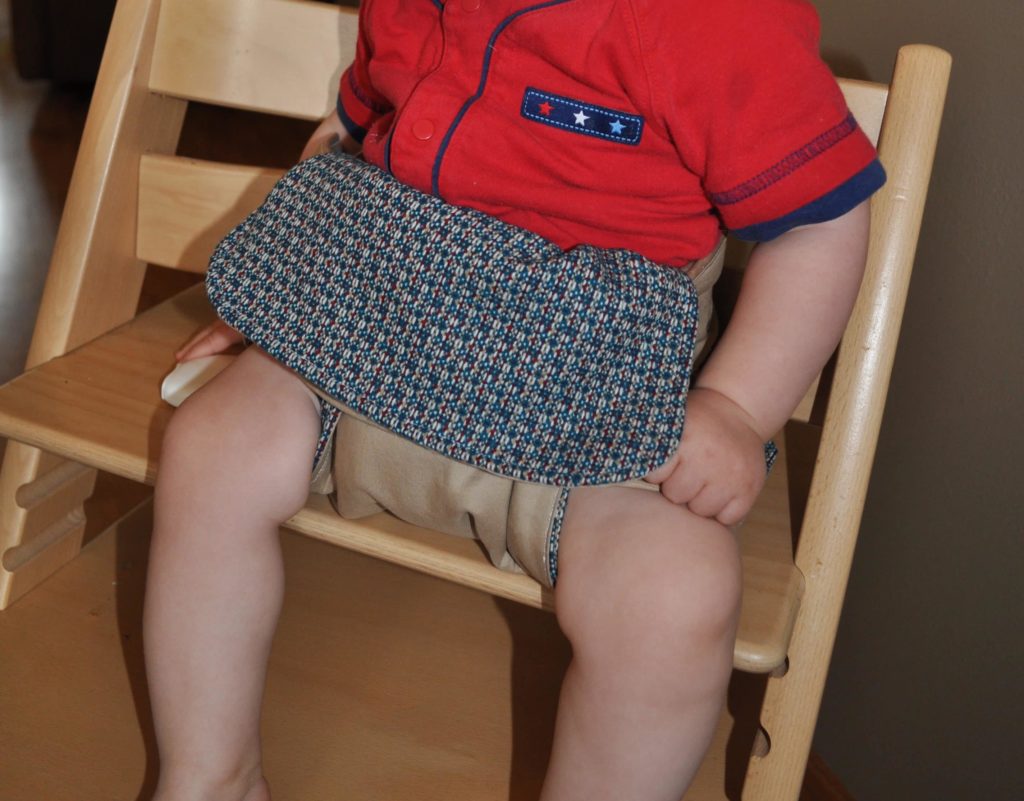
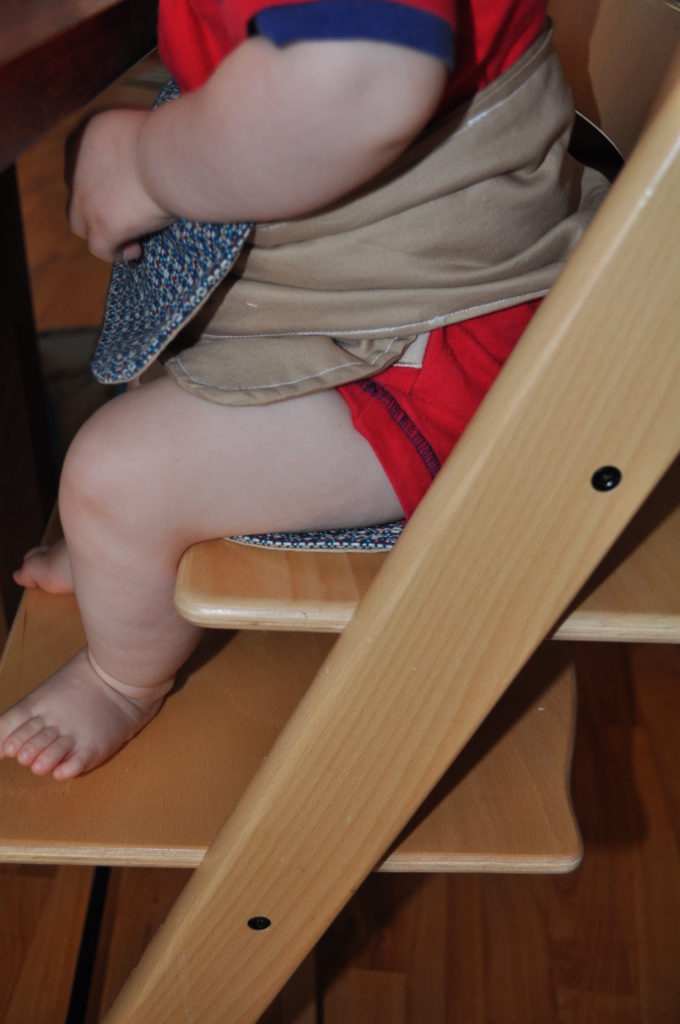
That’s it! All you need to do now is to put the strap on the chair with the baby sitting on the seat part. Then, you will take the long strap and weave it somehow into the posts of a chair. Once it is brought through, you will wrap it around the baby and secure with the Velcro. This was such an easy baby feeding chair / toddler high chair to make, and I think that it was the best travel high chair, because it didn’t take up too much room in my suitcase. Try one for yourself! I’m sure you’ll love it!
Never leave the baby alone in the chair. This travel high chair strap will hold baby in place, but all children are different. Make sure you watch your child and be sure that they strap is tight, but not too tight!
Here is the end result unfolded and in use! 🙂
Be sure to share this tutorial with others and let me know how your version turns out. I’d love to see pictures of what you make!
Please leave me a comment, and tell me all about it! Don’t forget to check out my other sewing tutorials! Find them all here!
I also have many video tutorials, which you can find here!
Pin it and Save it for Later
Kelly
Hi! I'm Kelly, an American mom and wife to a Dane. After deciding to move to rural Denmark in 2016, I decided to share the highs and lows of expat life in Denmark with lots of fun family experiences and trips in Denmark to make it all a bit more interesting! :) Welcome to My New Danish Life!
One Comment
child protection
Nice post it is very helpful hope to see more