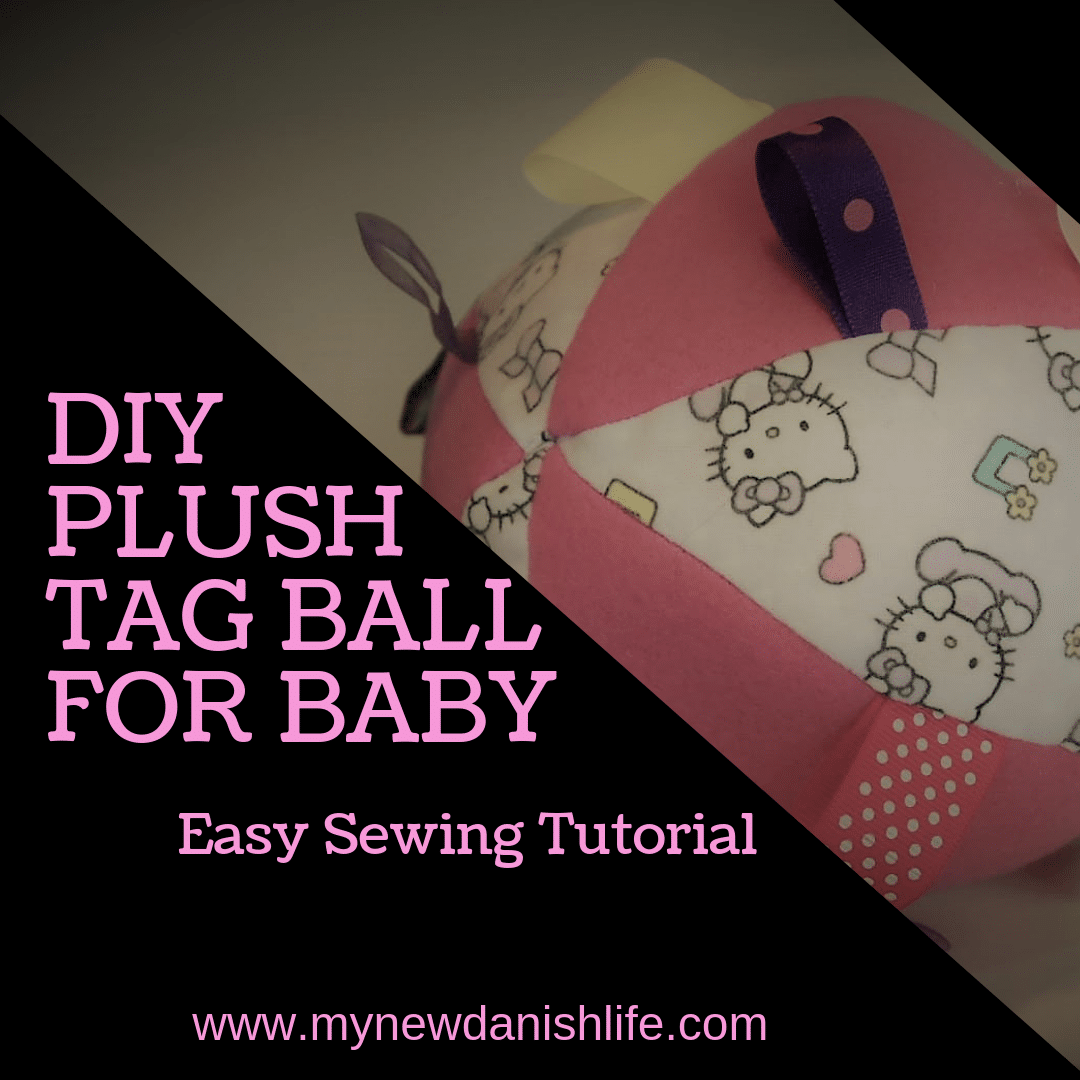
DIY Plush Tag Ball for Baby (Beginner Sewing)
It seems that I know lots of people having babies, so after a few years of taking a break from making new things for babies, I am back. I decided to look online for ideas for different beginner sewing projects for babies, since it had also been a while since I had made anything new.
Free Printable Pattern and Finding the Materials
I stumbled upon a free pattern from Grand Revival Design for a toy plush ball for baby that I thought looked like fun. The pattern allowed  you to choose between three sizes, and since this was my first attempt at making it, and my first attempt at making a ball of any kind, I thought I’d go big! I printed out the pattern and cut out the largest of the three.
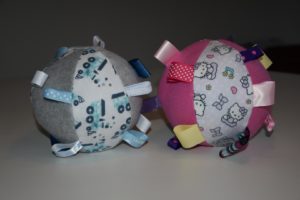
Next, I needed to decide which type of fabric to use. Since there would be six pieces of fabric in total, I could have six different pieces withdifferent textures, I could alternate, or I could use just one. Since I knew I was making this for my friend’s little girl, I thought about using my flannel, Hello Kitty fabric, and I had a nice hot pink, fleece fabric that could go with it. Feeling that the two fabrics were enough, I cut out three pieces of each of them.
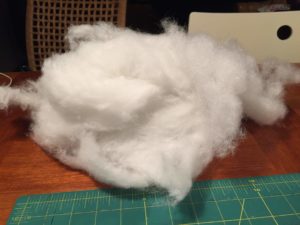
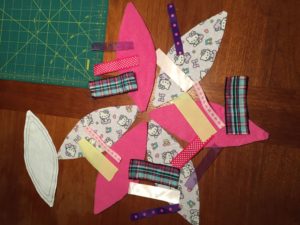
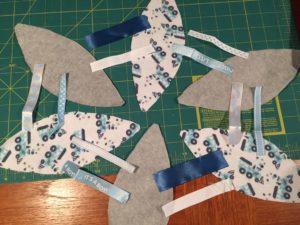
Looking at the pieces, I thought that the ball would be a bit plain, so I did a search on Amazon.com for cloth baby balls to see what options were out there. I thought of combining ideas that I saw to modify this toy, which is where I got the idea of adding tags to it. If you have seen any of my other posts (Tag Blanket), you’d know that I like using tags on baby items. I think they are fun and who doesn’t love working with ribbons, right!? 😉 I decided to look through my stash to see what I could find, and came up with 7 different ribbons to use. Because I wanted to alternate between having 2-ribbon sections and 3-ribbon sections, I needed a total of 15 ribbons. I decided to use each twice, with the exception of the biggest and brightest being used three times. It is completely up to you how you want to design this toy. You can choose to use the same ribbon or 15 different ones. There is no right or wrong here! It is just what looks good to you. I wanted to have some fun with this project and make it look as colorful as possible. Besides pins, scissors, and a sewing machine, you will also need fiber fill (or fluff) for the ball.
In order to get the correct shape for the pattern, I pinned the paper pattern to the clean, ironed fabric and then cut. You can find all of the pieces here.
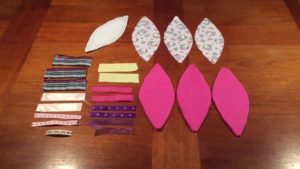
Once I had the tags and fabric cut based on the pattern’s descriptions, I organized them the way I wanted to sew them and placed ribbons where I wanted them to be.
Beginning to Sew
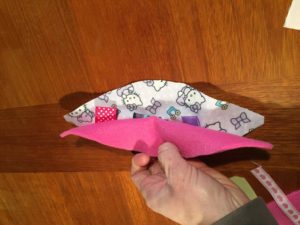
You want to take two sections and the ribbons that go in between them and set them off to the side. This will be what you work on first. Fold the ribbons and place where you would like them to be on top of one (Hello Kitty) piece of fabric. Put the “right” side of the other fabric (pink) on top of this (touching the “right” side of the first/Hello Kitty fabric). Pin it together making sure that there is a pin in each of the ribbons. The ends of the ribbons should be sticking out about a 1/4 an inch or so.

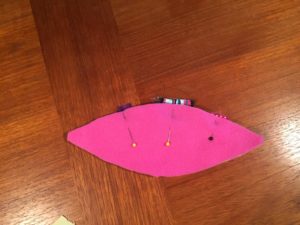
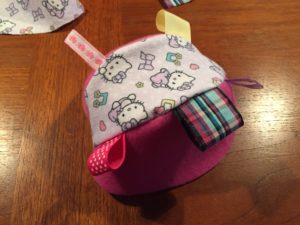
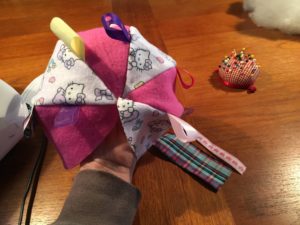
Next, you are going to sew from one end to another (ribbon side only), adding a back-stitch when you start and end. Then, repeat this with the next piece of fabric and ribbons. This is a picture of what it should look like after having three pieces sewn together.
You will continue pinning and sewing pieces (right sides) together until you reach the final piece.
When you only have one piece left, you will still have ribbons for both sides. If you chose to make an alternative pattern of three ribbons-two ribbons, I would recommend sewing the side with the most ribbons on first. You can go ahead and do this just as you have the other pieces. Be mindful that you are sewing through all the other pieces when you get to the ends, so there won’t be a hole left at the end.
 Now, you are left with two ribbons. First, you will want to flip the entire project inside-out.
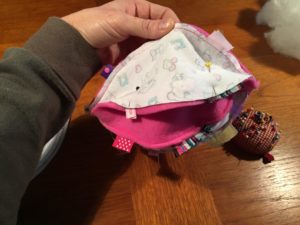
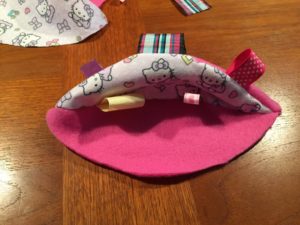
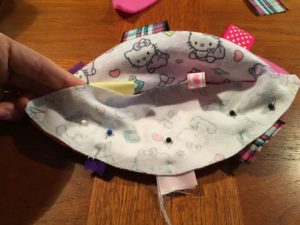
Then, you will want to pin the two remaining ribbons in place. You will NOT be sewing this side like the others! Instead, you need to start at one end of the fabric and sew until you pass the first ribbon. Sew a back stitch and then stop. Then you will want to start just before the second ribbon and sew all the way to the other end. This will leave a hole in the middle for you to flip the fabric right-side-out again.
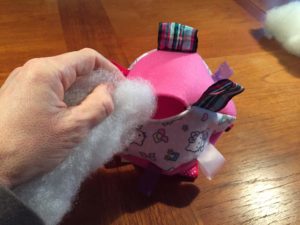
Then, you will take your fiberfill and stuff the ball until it is nice and round.
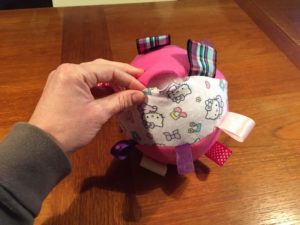
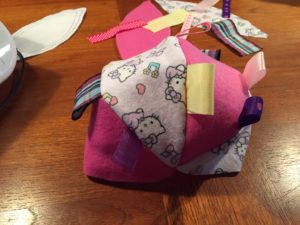
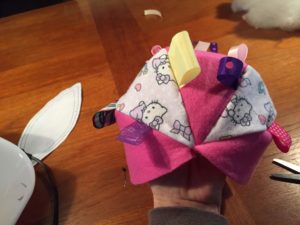
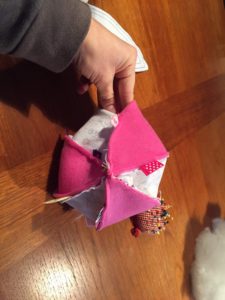
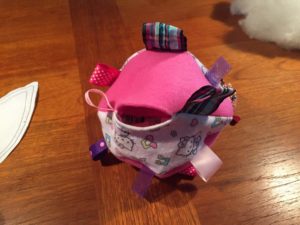
All that is left to do now is to hand stitch the hole closed. You can do this with matching thread and a needle. I recommend using an invisible stitch. Here is a picture of the finished project. I also made a blue one for another friend’s baby. Below it is also a picture of the organized pieces before I began to sew in case you are interested.
I hope you have enjoyed this tutorial. If you have made one of these plush balls, I’d love to hear about it in the comments. Please be sure to subscribe to my blog and see more posts like this one or others about travel and family life. You can also see the video tutorial for this project on my Youtube channel.
Kelly
Hi! I'm Kelly, an American mom and wife to a Dane. After deciding to move to rural Denmark in 2016, I decided to share the highs and lows of expat life in Denmark with lots of fun family experiences and trips in Denmark to make it all a bit more interesting! :) Welcome to My New Danish Life!
You May Also Like:
Thomas the Train Birthday Party: Choo, Choo! Look Who’s Turning Two!
Cute DIY Tag Busy Blanket: Beginner Sewing Project
