Car Caddy Tutorial and Video Link: Beginner sewing
 I saw a really cute car caddy a few months ago online, but when I tried to find the
 tutorial, it went to Etsy. I wanted to make it, not buy it, so I kept looking around. There are lots of different ideas out there for car caddies, which I was very excited about. I just didn’t see the perfect one for me, so I stopped looking and focused my attention elsewhere.
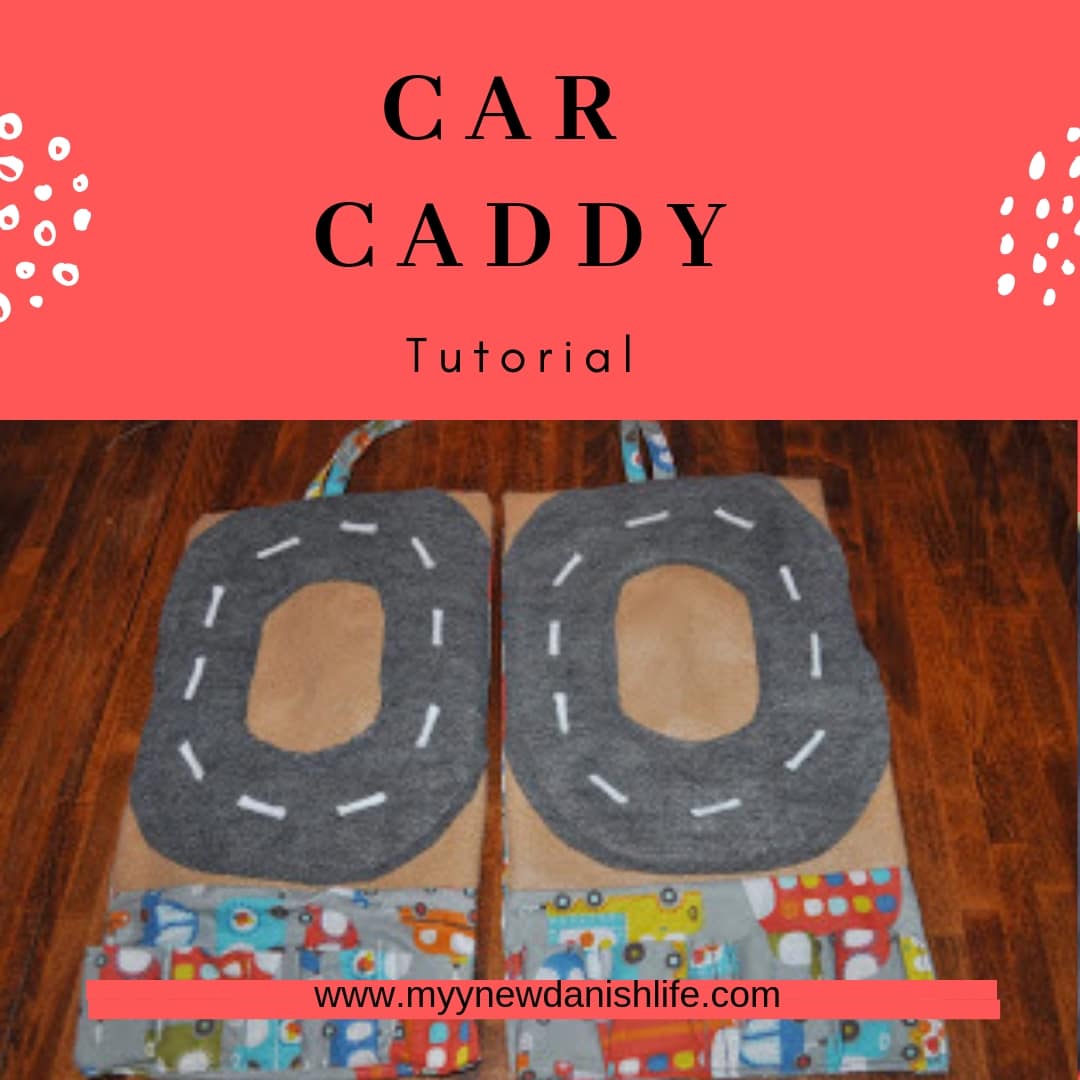
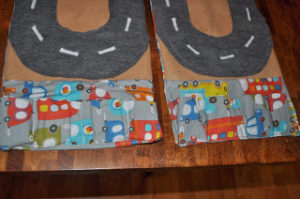
Lately, it seems that both of my boys are interested in playing with cars, and since we will be traveling soon for the up-coming holiday, I thought I would start my search back up once more for the perfect car caddy. This time, I choose to use Pinterest, since that is where I go most often these days when looking for ideas. I, again, found many of the ones I saw before. My Little Gems had a great example, but I didn’t want that many cars in the caddy. Homemade by Jill is a personal favorite, because she just does wonderful stuff. I love her designs, too. She is really talented. Again, I chose not to use this one because it had too many cars in my opinion. I finally decided to go with Sustainability Adventure, because it had spaces for only 4 cars and because I really liked the round road as opposed to the straight drag strip of the other caddies. This seemed more fun in my opinion.
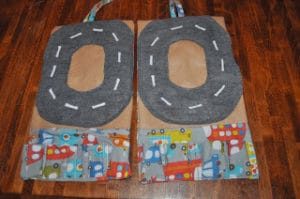
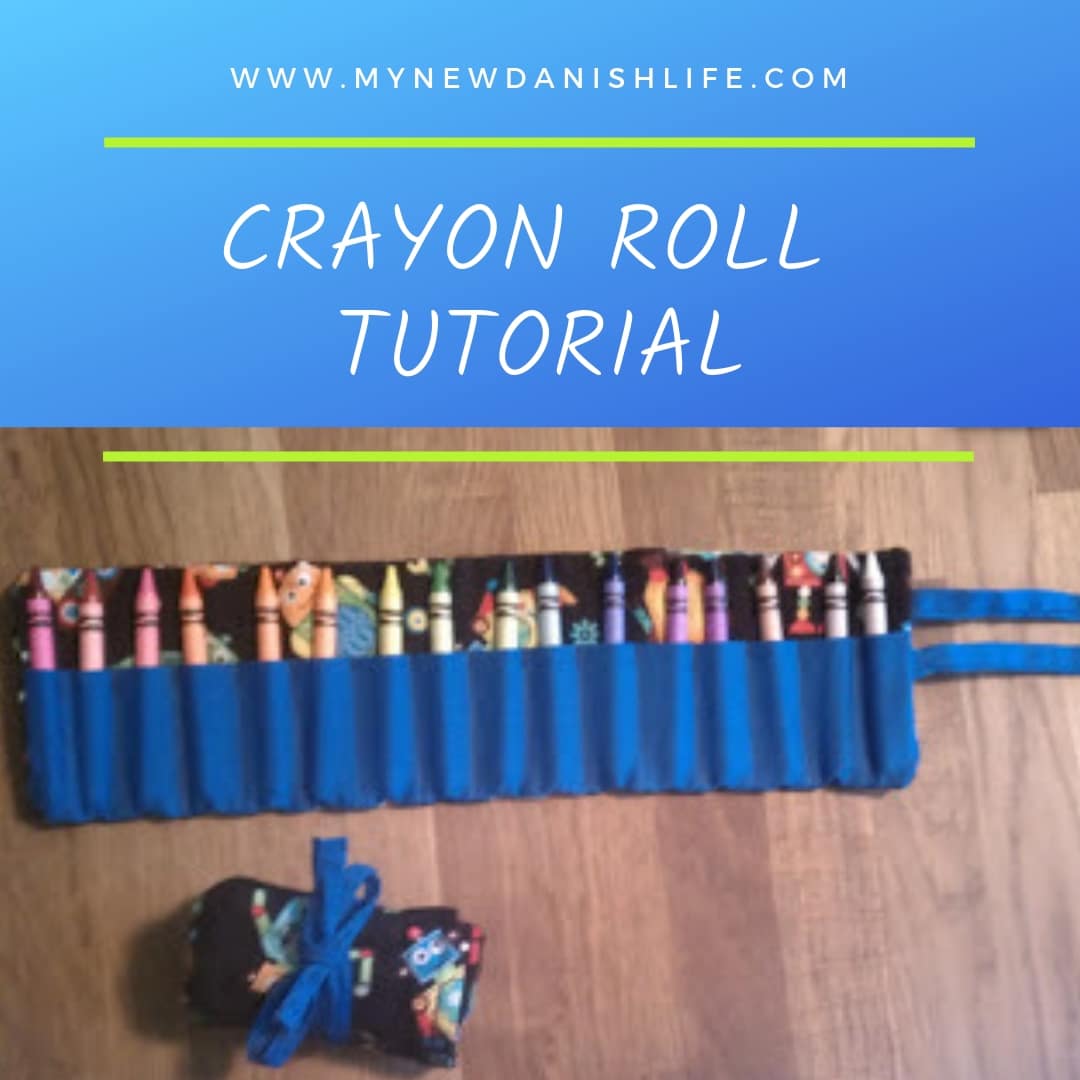
I followed her tutorial perfectly (except for the Velcro) for the first one, but I regret that I didn’t do the pockets before sewing on the back. I have made crayon rolls in the past, so I knew not to put the back on until everything on the other side was done. I chose to follow what she did and hope for the best, but when I made the second caddy (for my other son), I made sure to sew the back on last. I was happier with this look when comparing the two. The back of the left one doesn’t show any lines because I put the back on when I was all done with sewing. The right one has the lines, which I think looks a bit tacky. I made this for my son, so I am not concerned with being judged. He loves it no matter what. As you can see from the race-track view, they look pretty much the same.
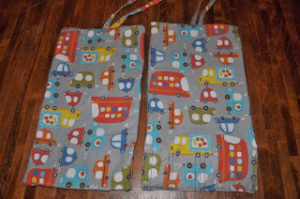
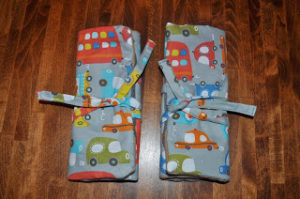
Also, if you read the bottom of her page, it says that she wished she used ties instead of Velcro. When I made my crayon rolls, I used ties instead of the button used in the tutorial. Overall, I was much happier with the result that time as well as this time. I also really liked the tutorial at Create Oh La La, but I am very happy with the one I chose! 🙂 All rolled up, the measurements are: L8″xW4″xD1 1/4″. Perfect size for a purse, travel bag or backseat car pocket. Here is a link to the video tutorial I made on Youtube showing my changes. (See video below!)
UPDATE:
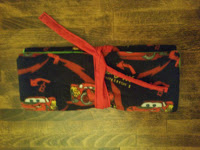
I ended up making two more for my friend’s boys. I used Cars fabric.
 I’d love to read your comments! Please leave them below!!
https://www.youtube.com/watch?v=rG6sf0N7Kuk&t=12s
Kelly
Hi! I'm Kelly, an American mom and wife to a Dane. After deciding to move to rural Denmark in 2016, I decided to share the highs and lows of expat life in Denmark with lots of fun family experiences and trips in Denmark to make it all a bit more interesting! :) Welcome to My New Danish Life!

One Comment
Pingback: